Latest Posts
Showing posts with label how to. Show all posts

Thursday, 19 September 2013

How to install apps outside of Google Play

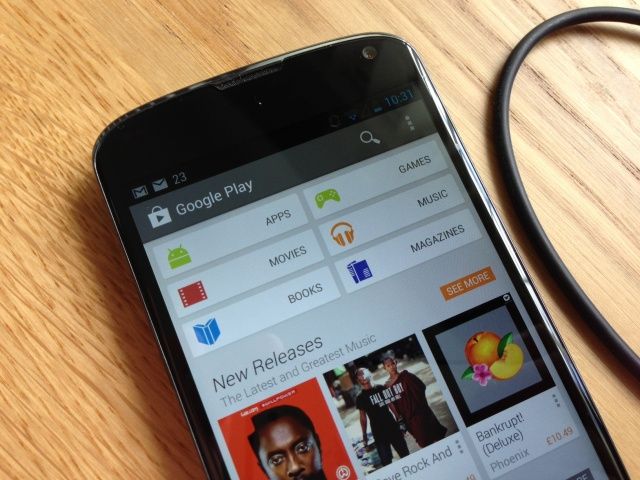
Google has removed apps from the Play store for a number of reasons, the most common being that they violate the company's policy. Once an app is removed, however, all hope isn't lost.
 
Here's how to do it:
Setting up your device
From your smartphone or tablet running Android 4.0 or higher, go to Settings, scroll down to Security, and select Unknown sources. Selecting this option will allow you to install apps outside of the Google Play store. Depending on your device, you can also choose to be warned before installing harmful apps. This can be enabled by selecting the Verify apps option in the Security settings. 


On devices running an earlier version of Android, go to Settings, open the Applications option, select Unknown sources, and click OK on the popup alert.
Downloading an app
The next step will be finding an Android package file, also known as an APK, which is the way Android apps are distributed and installed. This is where some people usually run into trouble. Never, and I mean ever, use sideloading as a way to pirate applications; doing so will likely result in your Android device getting a virus. You should only download APK files from trusted developers and companies.
For example, Grooveshark, a free online music streaming service, previously had an app in the Play store. After a dispute with Google, however, the app was removed. Grooveshark now offers the app on its Web site for users to sideload. 

The process
You can either download the APK file on your mobile device or on your computer, although the latter is a little more difficult. To get started, download an APK file using either Google Chrome or the stock Android browser. Next, go to your app drawer and click Downloads; here you will find the file you just downloaded. Open the file and install the app. 

If you downloaded the APK file on your computer, the process is slightly different. You must connect your Android device to the PC and enable USB mass-storage mode. The next step is to drag and drop the file onto your device. Then, using a file manager, such as Astro or ES File Explorer, you can locate the file on your device and install it.

Remember to be careful when downloading apps outside of official Android marketplaces like Google Play and Amazon's Appstore.


more »

Friday, 30 August 2013

Best 15 tricks For Nexus 4 You should Know


1. Trace to type

One of Android 4.2's most significant new features is its trace-to-type keyboard. If you've used Swype in the past you'll know what to expect. Instead of tapping on each key to write something, you merely draw a line over the letters in sequence and lift your finger from the screen to add a space and move onto the next word. To enable it, go to Settings > Language and Input, and select the Android Keyboard option. Make sure 'Enable Gesture Typing' is ticked, and you're away. 


2. Share things instantly with Android Beam

 
Thanks to the inclusion of a NFC chip inside the Nexus 4, you can share data simply by holding your phone next to a compatible device. If you know someone else with a NFC-packing handset -- such as the Nexus S or the Galaxy Nexus -- you can use this feature to display things directly on their screen. If you're viewing a Web page, for example, or a Google Play listing, you can show your friend by beaming the same page to their device, instantly.  


3.Take a 360-degree images with Photo Sphere

Panoramic photos are so last year, man. The Nexus 4 can take 360-degree shots, thanks to its unique Photo Sphere option. It takes a while to compose the image as you have to take multiple shots, but the end result is unique to say the least. 


4.Lock screen widgets


Yet another new feature for Android 4.2 is lock screen widgets. From your lock screen you can take photos, browse your emails and check calendar appointments -- all without having to unlock your Nexus 4. This is especially handy if you use a gesture or passcode to secure you phone, as it saves you from having to input it every time you receive an email.  

5.Secure your phone with Face Unlock

 
One of Android's unique functions, Face Unlock allows you to access your device using nothing but your face. To enable it, go to Settings > Security > Screen Lock and select 'Face Unlock'


6.Charge your Nexus 4 without wires
 
Although it's not available yet, the Nexus 4 has its own wireless charging station, which tops up the phone's battery using induction charging technology. Thankfully, there are alternatives if you're fed up of waiting for Google and LG to get their collective acts together, such as the Philips Qi Charging Pad. 

7.Make your screen smarter
 
Screebl is one of the first applications I download whenever I move to a new Android device. It uses your accelerometer to tell when you're holding the phone and looking at the screen, and disables the timeout. This means you don't have to keep prodding the display to prevent it from sleeping if you're reading a web page or other content. When you rest the phone down on a flat surface, Screebl quickly puts the display to bed. Genius. 

8.Automatically back up all of your treasured photos

Google+ may not have taken the social networking world by a storm, but the Android application has one fantastic use -- it boasts an option, which allows you to automatically upload photos you've taken on your Nexus 4 to your Google+ account in the cloud. Even if you lose your device, you won't lose all those valuable memories.


9.Silence your phone fast
For those moments when holding down the volume button just isn't a quick enough way of shutting up your phone, you can hold down the Nexus 4's power button briefly to bring up a separate menu. From here you can put your phone into silent or vibrate mode with a single tap, saving your blushes during important meetings.  


10.Access your music from the cloud

Google Music is now available in the UK, and the Nexus 4 is the first phone to benefit from this expansion. You can upload your songs using your PC and then access them from the pre-installed Google Music application on your new Nexus phone. If your music doesn't show, check the app settings to ensure that it's been synced with your relevant Google account. 


11.Put your Nexus 4 into a Daydream

Daydream is another new facet of Android 4.2. It allows you to display content on your Nexus 4's screen either when it's docked or simply charging at the mains. You can have it show a clock, fancy colours, content pulled from your Google Currents account or even a selection of photos.


You may also like


12.Power control

 
It's one of Android's most useful widgets and should be on every self-respecting owner's homescreen -- the Power Control widget allows you to toggle features such as Wi-Fi, Bluetooth, auto-sync and screen brightness, all with a single tap.  


13.View your Google Play library from your homescreen

Introduced with the launch of the Nexus 7 tablet earlier this year, the Google Play library widget gives a snapshot of the most recent movies, music and books you've either purchased or accessed recently. As well as looking rather fetching, it allows you to quickly jump back into content you've enjoyed over the past few days. You can place the widget on any of your five homescreens by selecting it from the Application Drawer. 


Set applications to auto update
When you've got a shed-load of applications on your Nexus 4, manually installing updates can be a pain. Thankfully, there’s a way of automatically downloading and installing updates without having to lift a finger. Go to the Google Play market and select an app, then check the box which says 'Allow automatic updating'.  


13.Tidy up your homescreens

Even with five different homescreens, things can become crowded on your Nexus 4 if you're download-happy. A way of getting around this is to group apps into folders. All you have to do is press and hold down on an app, and then drag and float it over another app -- this will create the folder. Tapping a folder expands it and displays the contents within, and tapping the name of the folder will allow you to give it a more suitable moniker. 
more »

Monday, 26 August 2013

How to tweak android to use less data-Tips and tricks


Whether you're actively using them or not, apps love to eat up data. They're checking for updates, running ads, and refreshing your user content in the background. The good intentions are there, but most times, the conveniences these practices bring don't outweigh the depleted data reserves. It's time to tame those apps.

Update apps and download files on Wi-Fi only
Head to the Google Play store and tap Menu > Settings > Auto-update apps. Here, be sure that "Auto-update apps over Wi-Fi only" is selected. You also have the option to choose "Do not auto-update apps," but it's less preferable, since you'll have to remember to update apps manually.

Configure in-app data settings
To give you a fluid experience, many apps ping servers in the background to keep their content updated. For instance, Google+ backs up your photos and videos as they're captured, while Mint can be configured to refresh banking data.
These conveniences are great, but they come at a cost, so dive into the app settings and disable the data-sucking options you don't absolutely need.

Restrict background data
Even apps that don't allow you to fine-tune data settings could still be loading background data. In Ice Cream Sandwich and later versions of Android, one way to find out which ones are guilty is to go to Settings > Data Usage, and scroll down to reveal a list of apps with accompanying data usage stats.
 scroll down to the bottom and check "Restrict background data." 

you may also like: 

Fine-tune sync settings
During the initial phone configuration, you probably opted into account syncing. By default, everything is set to sync, including things like photos, the Play Store, and other Google apps. You don't necessarily need all these items syncing -- especially data-heavy ones like photos.
To adjust sync options, head to Settings > Accounts > Google, and select an account. Here, uncheck the boxes next to the items that don't absolutely need to be synced. Repeat the same process for other accounts.
After that, you can manually sync accounts by visiting their respective apps. 

Temporarily switch off sync
Going out for the night? Sitting at your desk? Prevent your phone from unnecessarily syncing data by disabling syncing, either from the notification bar, or by going to Settings > Data Usage > Menu > uncheck "Auto-sync data."

Monitor data usage
One of the most useful Android features is the Data Usage tool. With it, you can view your monthly activity, see which apps demand the most megabytes, and configure usage warnings. 
Alternatively, Onavo Count offers a similar solution, but steps it up by including a widget, letting you keep an eye on real-time data usage at any moment. 

Compress all data activity
As an absolute last resort, Onavo Extend takes its Count app a step further by actively compressing almost all incoming data. For instance, e-mails are simplified, Web pages are compressed server-side, and photos are optimized.

more »

Sunday, 25 August 2013

Manage your reminders on Google Now

 
Within just a short period of time, Google released two updates that show it really wants people to start using Google Now and its Reminders feature. The first update to Google Keep added the option to set reminders for notes, which tie into Google Now. The second update to Google Now itself adds the ability to set reminders for your favorite artists and TV shows.
Google Now Reminders has a lot of potential, but currently the biggest issue with it is the lack of easily accessible editing. Let's say you set a reminder to get alerted when there's new episodes of a TV show, but later you change your mind. How do you delete the reminder? Or if you set a reminder in Google Now -- not Keep -- and need to change the time or location you need to be alerted, where do you edit the reminder?
 

  • In order to delete or edit a currently set reminder, you'll need to launch Google Now and then scroll to the bottom of your cards. From there, tap on the menu icon and select "Settings" followed by "My Stuff" and finally Reminders.
 

  •  
  • After going through the chain of taps, you'll see a list of your currently set reminders, both from Keep and Now. There's no indication of where each reminder originated, but they're both there nonetheless (why Google Now Reminders don't show up in Keep is a mystery). Tapping on an Ongoing reminder will give you the option to delete it, as will selecting a Past reminder. Editing an upcoming reminder simply requires you to tap on it, change the alert options, and save. 

You May also like: 

The easier method to setting reminders you'd like easy access to edit later on is to use Keep, but that semi-defeats the purpose of using the convenient voice commands of Google Now to set said reminders.
more »

Tuesday, 20 August 2013

6 Basic tricks to speed up your Android Device

Android Phones Become Slow And Sluggish overtime Use This Basic tricks to Speed Up you Phones


1.Clear app caches


Cached data can build up over time in your applications and affect the performance of your device. Deleting individual caches can be done in the Apps menu, but a number of free programs are available through the Google Play store that can automate the process. Some of the most popular ones include App Cache Cleaner and Clean Master, both of which are available for free.

2. Uninstall or disable unused apps

Your device has a limited amount of internal storage and the less free space it has the slower it will perform. If you have filled your device with photos, music, or apps, it is recommended to free up space by either uninstalling unused apps or moving files to cloud storage services like Dropbox or Google Drive.
Uninstalling apps can be done by going to Settings, opening the Apps menu, and selecting the app you wish to uninstall. Preloaded applications from carriers or manufacturers that cannot be uninstalled, known as bloatware, can at least be disabled and hidden from the app drawer using this method.
On smartphones and tablets that include expandable storage you can also move apps to the microSD card. To do this, enter Settings, go to the Apps menu, click the app you wish to move, and select the "Move to SD card" option.

3. Disable animations
 
A hidden settings option in Android will give you access to commands you may have never known existed. Go to Settings, About Phone, scroll down to Build number, and tap it seven times. You will now have access to developer options. These special settings allow you to do a variety of things, but they are meant for advanced users and shouldn't be changed unless you know what you are doing.
One tweak that could speed up your device is disabling animations within the operating system. To do this, open Settings, go to Developer options, and scroll down to the Drawing option. Next, turn off the Window animation scale, Transition animation scale, and Animator duration scale. This will disable animations that occur when you open, close, and switch between apps. Although the interface will look less polished, there should be less lag in performance. 

4.Limit widgets and live wallpapers

Many people would argue that widgets are one of the benefits of using an Android device. They can be helpful for finding information quickly without having to open an app, but at the same time they can eat away at battery life and slow your device.
Reducing the number of widgets, especially data-intensive ones like Facebook, will help your smartphone or tablet run more smoothly and last longer. You can remove widgets from the home screen by long-pressing the one you wish to delete and dragging it to the top of the screen.
Another cool Android feature is the option to use a live wallpaper as your background. Like widgets, however, live wallpapers can slow down your device and drain the battery. You can also change your wallpaper with a long press on the home screen. 

5. Get software updates
 
Manufacturers and carriers are continually pushing out new software updates to their devices. It is imperative that you be on the latest firmware as these updates usually include security and bug fixes, among other things that will improve the overall stability of your device. To check to see if there is an update available, go to Settings, select About Phone, and choose the "System updates" option.

6. Rooting, ROMing, and more

Risk takers and advanced users can also root their device, which will open the door to new features and even greater performance boosts. Rooting gives you the ability to overclock the device's processor, install a custom ROM, and other things; however it also voids your warranty and could cause irreversible damage to the device.

 
more »

Wednesday, 26 June 2013

How to Reset Your Blackberry Z10 Phone

How To Reset of Factory Setting Your Blackberry Z10 Phones
How To make your bb phone back to new state


Buying a new phone and having a mess with it can irritate you a lot about it.the business phone such as blackberry can cause you a lot. If your new Z10 or other is running slow and has some random bug, you can switch it off by pressing Power button for a few seconds.

 First Try to create the back of all your important data to do it follow the link here:
http://digitalinspiring.blogspot.in/2013/06/backup-and-restoring-of-data-in.html

Restart it by pressing the same key again. But in case, the device is unresponsive, you can keep the key pressed for around 10 to 15 seconds to do a hard reboot. This will not delete your data.

In case, you want the device to be restored to factory settings,

 go to Settings > Security and Privacy > Security Wipe.
 Type blackberry to confirm the process and you're done.

Depending on the amount of data you have, the process can take from a few minutes to even half an hour, or longer.


If you like the post please share it or tweet it ,pint in 
like us at facebook :fans of limitless
more »

Backup And Restoring Of Data In Balckberry Z10

Backup your Content,apps etc to cloud and restore it
Backup and restoring of bb10 data

  • Backing up from a Z10 or Q10 is slightly old fashioned and reassuring, as it stores the data on your computer. To create a back up, download the BlackBerry Link application and install it on your PC.
  • Connect your phone to the computer using its cable. BlackBerry Link will identify the device. Click on the Settings icon (top right in the program).
  • In the General section, check Back up My Device and Select Data To Include In Your Backup Files. On the left pane, click on Back Up Now.
  • To restore the data, you will have to use the same application. Along with the Back Up Now option, there is a Restore Device Data option. Use that to restore the data to your device.

BACKING UP AND RESTORING AN OS7 DEVICE


Users who have OS7-powered BlackBerry phones can back up their data locally on their computer as well as to the cloud. To back up on your local computer, download the BlackBerry Desktop Software from the company's website and install it on your PC. Then connect your handset to the computer, click BlackBerry device on the left panel in the Desktop Software and select Backup Now on the main screen.

  • To restore the data that you had saved previously, connect the phone to computer and click on Devices at the top left corner of the program.
  •  From the dropdown menu, select Restore and follow the instructions on the screen.


The other way to back up and restore contacts, etc, on OS7 devices is through the BlackBerry Protect app that can be downloaded from BlackBerry World for free. It can't save data for BB10 devices, but for OS7 devices it can be used along with the BlackBerry Protect website to manage backups and restore your phone.

more »

Tuesday, 25 June 2013

INSIDE IPAD -How They Made It

INSIDE IPAD

BREAKDOWN Of IPAD-Getting under the hoods


Since tablets are light and compact, their primary purpose is mobile computing. This means that they must have suffi cient battery life despite the large display screens and touch interface. Here’s the hardware that helps manufacturers make that happen.


Components That Consists of The tablet IPAD:

PROCESSORS  OPERATING SYSTEMS

@   STORAGE SPACE     @  TOUCH SCREEN UI  @   SENSORS CONNECTORS
@   CAMERA


The Cost Of Making A Single Ipad Can cost upto $499-$699 So why such a huge price for it lets see inside it:

processor:
The brain of any tablet is the processor that powers the core working of a tablet. Most tablets today are powered by the processors from ARM or those based on Intel’s x86 architecture. A typical chipset based on the simple ARM architecture can handle 4 million instructions per second at 8 MHz (ARM1) to a maximum of 220 million instructions per second at200 MHz (ARM9E). The architecture is licensed to a host of companies to develop their own processors, including the Qualcomm Snapdragon, the Samsung Hummingbird, Nintendo, Nvidia Tegra and the
Apple A4.


Os
The heart of the tablet is the operating system. The most prominent OSs for tablets include the iOS (a proprietary
OS for Apple devices)

Storage Space:
Tablets come with varying memory capacities,starting from 2 GB (Wespro Epad) to as much as 64 GB (Apple iPad) built-in storage space

Touch Screen:
A touch screen user interface is a bit different from the graphical user interface primarily due to the touch-based inputs The iPad features a proprietary UI developed by Apple, there is the TouchWizUI from Samsung, and the Sense UI by HTC.

Source  info:apple 

Sensor
---The touch screen in a tablet is not pressure-based,relies on several sensors.
===The high-end tablets include an accelerometer, ambient light sensor and temperature sensor. The accelerometer ===or the gravity sensor helps to change the orientation of the screen in terms of how it is held.
===The ambientlight sensor adjusts brightness and contrast of your tablet screen with respect to lighting conditions.
===The temperature sensor intimates you of your battery heat levels.

CONNECTORS
Most of the tablets offer several ports like the USB and HDMI, a plus audio connectors and SD card and SIM card slots. However, the iPad is one of the few tablets that sports only one outlet that doubles as a charging port for the device.

Camera

Tablets usually feature a front camera for video calls on-the-go. The camera quality ranges from VGA quality right up to 8 megapixels.
more »

Monday, 24 June 2013

How To Backup Conatcts ,Message ,App For Resttng In Iphone

Backup Contacts ,Message ,App of Iphone

First of All I have two Methods To Backup  your important Things Just Like iCloud and Through itunes.iCloud Is An Cloud Service for Iphone,You Can Use It To Back uo All Your Important Content into it.While iTunes requires Pc an An USB cable to connect on which The itunes has been installed.


BACK UP THROUGH iCLOUD:

You can use Apple's iCloud service to back up your phone's data (contacts, app settings, messages and images) to its servers. To enable this feature, click on Settings > iCloud > Storage and Backup > On. Alternatively, to back up your data manually, click on Storage and Backup > Backup Now.

BACK UP THROUGH iTUNES:

To back up your iPhone through iTunes, connect it to a PC on which iTunes has been installed. Once your device is identified, click on the iPhone shown in iTunes and select Backup.

HOW TO RESTORE YOUR PHONE

Whether you are setting up a new iPhone or restoring it after a factory reset, you are provided with three options: Set up as a new iPhone. Restore from iCloud (will require a Wi-Fi connection). Restore from iTunes Backup (will require a cable connection to your computer).


more »

Reset,Reboot,Restore Your Iphone

Trouble Shoot Your Iphone:

How To Reset Your Iphone


The Iphone Has A Better understanding Of The Software And hardware But Sometime Some Apps can Cause Harm to your Phone.Since Your Phone Conatins All Important Contacts,Apps There Might Be Some Problem That Can Cause Your Phone To just reboot and becomes fine.
But even if the occurances are rare, there might be times when apps start crashing, and the device seems slower than usual.

If you not want to lose all the data be sure to create the backup of it the methods of creating backup are here:

http://digitalinspiring.blogspot.in/2013/06/how-to-backup-conatcts-message-app-for.html

Restarting the phone is likely to solve some issues. To do this, press the Power button for a few seconds and then use the slide-to-power off option on the screen.

Problem:
If the problem persists, you can try resetting the device back to its factory settings.
 To do this, go to Settings > General > Reset.


In Reset, you are provided with several options...
If the issue you are facing is minor in nature, like a laggy phone, for instance, reset your handset using Reset All Settings. Don't worry. This option will not delete your data or the apps you have installed.

If your problem is a little more serious, where your phone restarts by itself or freezes during use, try Erase All Content and Settings.
 If your phone has frozen, you can try a hard reboot:

Hard Reboot: 

Press the Power button and Home button simultaneously. Keep both pressed for around 10 to 15 seconds. Release the buttons when you see the Apple logo on the screen. Your phone will reboot.


If your iPhone isn't booting up, hard reset it through iTunes (data will be lost).
Reset Trough Itunes:
Open iTunes on your PC or Mac and make sure it is updated.
 Then, connect the phone to your computer. If the phone is switched on, iTunes will recognize it. If it doesn't , keep the power and home button pressed. iTunes will then detect the device in recovery mode. Follow the onscreen instructions on your PC to complete the reset and restore process.
http://support.apple.com/kb/ht1414

more »

Unordered List

© 2013 Limit Less. WP Theme-junkie converted by BloggerTheme9
Powered by Blogger - Back to top